In Windows 11, the system stores the Downloads folder in your user account’s folder. For example, C:\Users\DEMO. By default, most web browsers save downloads to this Downloads folder too. Windows users can change the location of Downloads folder to another place on your hard drive, another drive, or another system on your network. As a result, all of your files in the Downloads folder will be saved to the new location. Now, how to move location of Downloads folder in Windows 11?
In this post, you will learn how you can change the default location of the Downloads folder to another location in the easiest way possible. Now, let’s get started!
Move Location of Downloads Folder in Windows 11
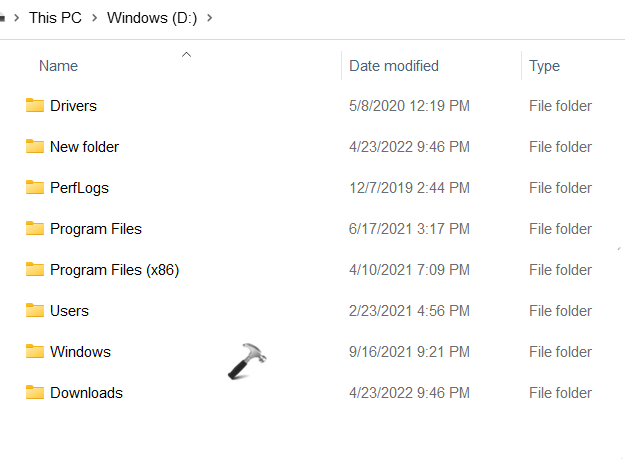
1. In the first place, you need to create a new folder by the name Downloads at the new location you like to move your Downloads folder to.

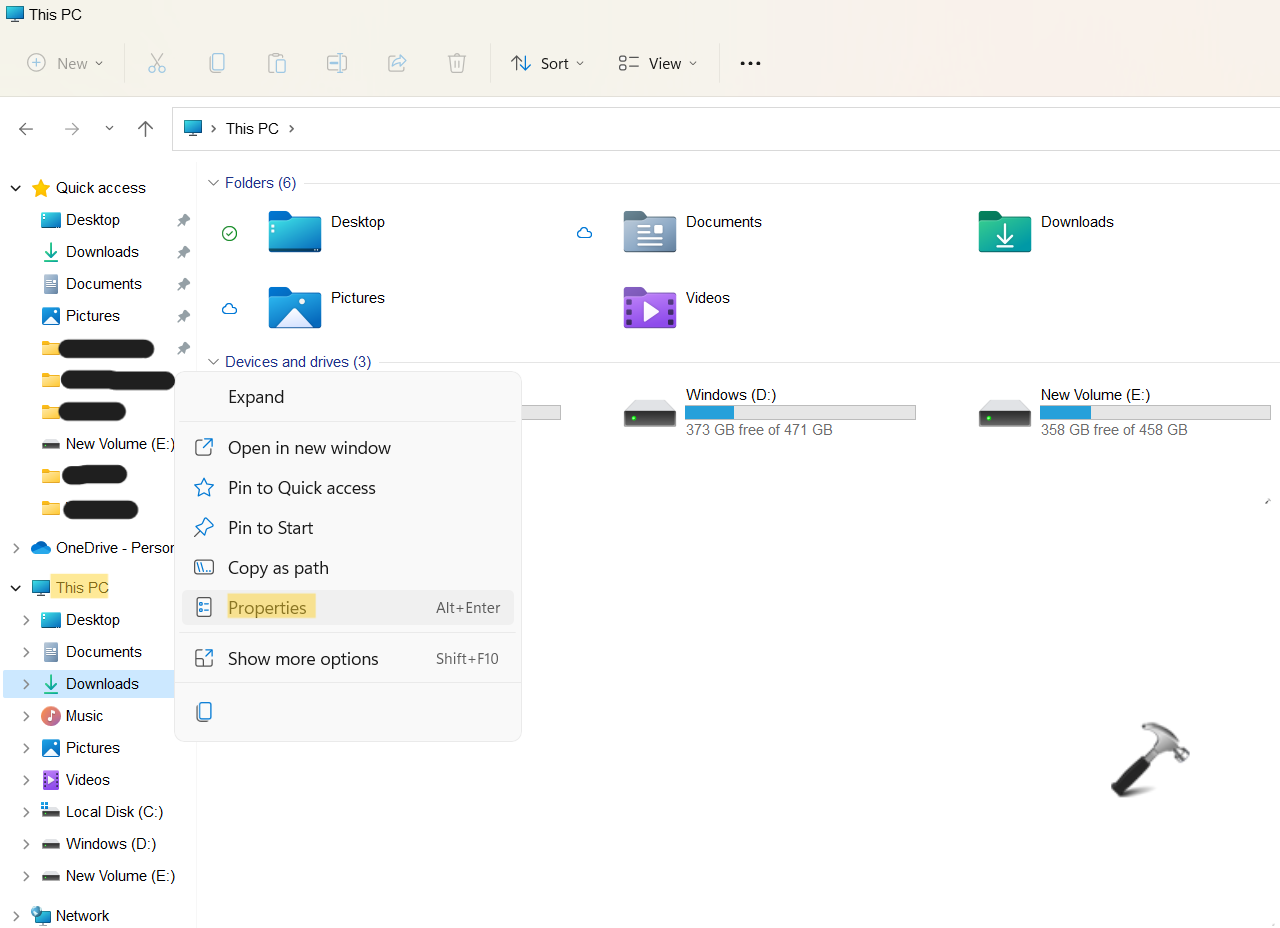
2. Once created, go to This PC in File Explorer. For this, press the Windows + E tabs simultaneously on your keyboard. After that, right-click on the Downloads folder and then, choose the Properties tab.

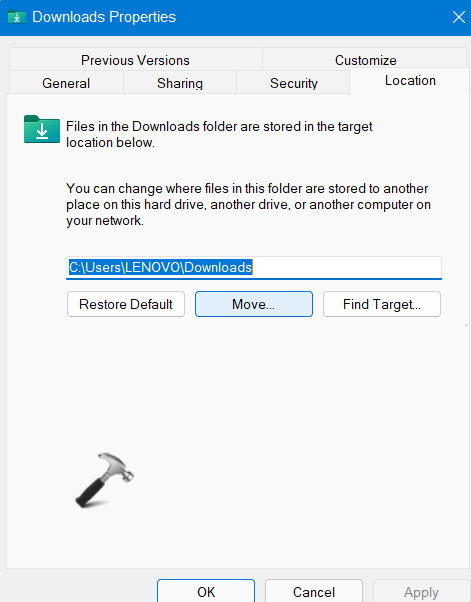
3. In the Properties window, go to the Location section. Next, click on the Move tab.

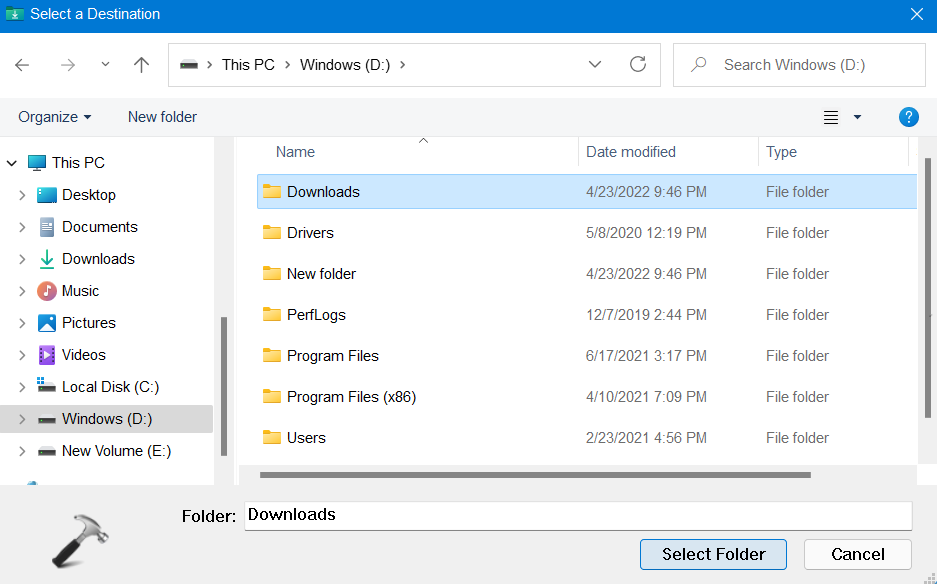
4. Now, you need to browse and choose the Downloads folder at the new location you created a while ago (in Step 1). Once done, click on the Select Folder button.

5. Lastly, press OK for saving the changes.

6. Next, you will be asked to move all the files from the old location to the new location. Click on Yes to confirm and proceed.

7. Now, your personal Downloads folder and its content will start moving to the newly created Downloads folder.
So, this is how to move location of Downloads folder in Windows 11. Now, you can move the Downloads folder to another location, like another drive or another computer on the same network without any hassle!
![KapilArya.com is a Windows troubleshooting & how to tutorials blog from Kapil Arya [Microsoft MVP (Windows IT Pro)]. KapilArya.com](https://images.kapilarya.com/Logo1.svg)


Leave a Reply