If you are unable to print documents or share files, then there could be some problem with Network Discovery. Network Discovery helps to build a communication between different devices on the same network. So, is Network Discovery not working in Windows 11?
In this post, learn how to fix this issue using different methods. Try these fixes one by one to resolve the issue hassle-free!
Page Contents
Network Discovery Not Working in Windows 11
Fix 1: By Running Windows Troubleshooter
1. Open Run by pressing the Windows + R tabs together. Once opened, type control.exe /name Microsoft.Troubleshooting and hit OK.

2. In the next window, click on Other troubleshooters.

3. After that, go to the Network Adapter tab and click on the Run button.

4. Now, Windows will begin troubleshooting the Network Adapter. Once done, keep following the on-screen instructions to resolve the issue automatically.
5. Lastly, restart your system after closing the Settings app.
Fix 2: By Updating the Network Adapter Driver
1. Firstly, right-click on the Windows icon and choose Device Manager.

2. After that, choose Network adapters. Once expanded, right-click on your network adapter and then, choose Update driver.

3. In the next window, select Search automatically for drivers. Windows will automatically look for the latest driver and update it.

4. Restart your PC and check if the issue is fixed.
Fix 3: By Checking Sharing Options
1. Open Run and type control.exe. Press Enter to open Control Panel.

2. Now, choose Network and Internet.

3. After that, select Network and Sharing Center.

4. Click on Change advanced sharing settings present on the left pane.

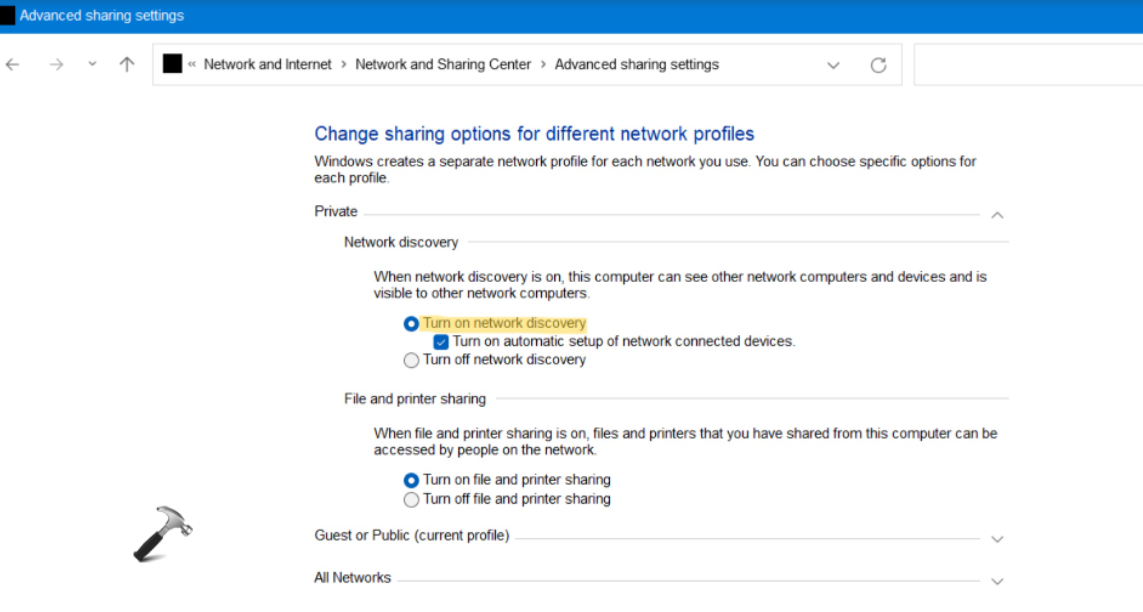
5. Now, go to your profile and click on the dot present next to Turn on network discovery.

Fix 4: By Enabling Network Discovery through Command Prompt
1. Open Run and type cmd in the Run dialog box. Now, press the Ctrl + Shift + Enter tabs together to open the elevated Command Prompt.
2. Next, type the following command and press Enter:
netsh advfirewall firewall set rule group="Network Discovery" new enable=Yes

3. To disable this feature in future, execute the following command:
netsh advfirewall firewall set rule group=”Network Discovery” new enable=No
Fix 5: By Using Network Reset
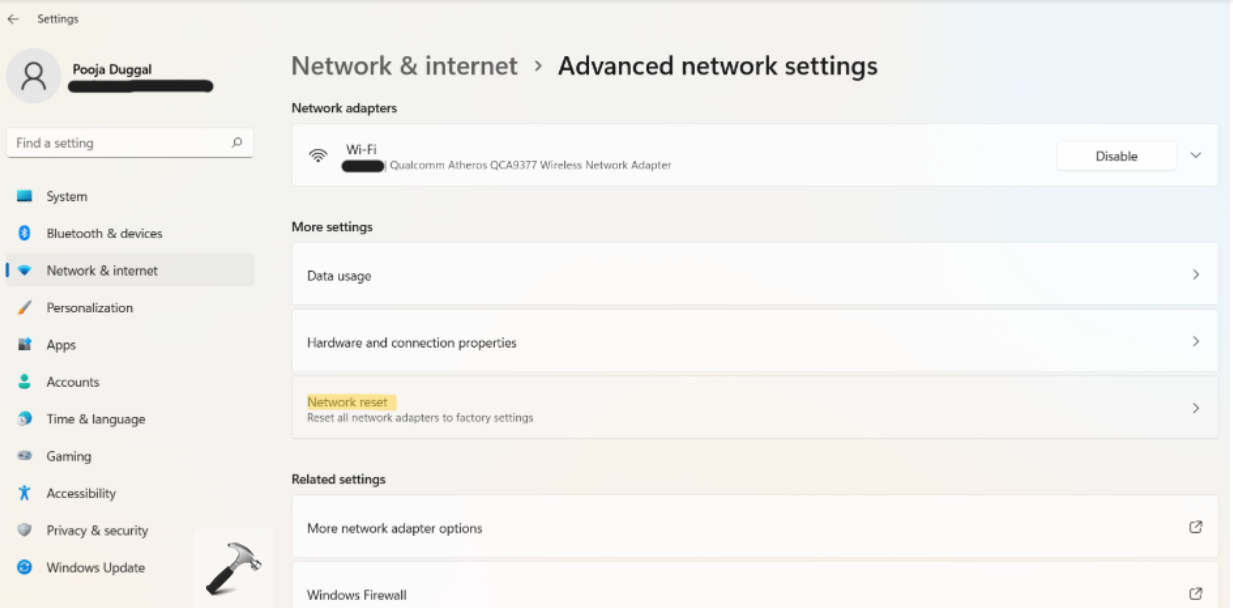
1. Open Settings and go to the Network & internet Once there, choose the Advanced network settings from the right pane.

2. After that, choose the Network reset option.

3. Lastly, click on the Reset now tab.

4. Restart your system and see if the problem has been fixed.
Fix 6: By Enabling Services Using PowerShell
1. Open Run and type Powershell in the Run dialog box. Next, press Ctrl + Shift + Enter tabs together to open Windows PowerShell with admin privileges.
2. Copy-paste the following command and press Enter:
REG add "HKLM\SYSTEM\CurrentControlSet\services\dnscache" /v Start /t REG_DWORD /d 2 /f

3. Also, execute the following command to change the startup type to Automatic (Delayed Start) for Function Discovery Provider Host and Function Discovery Resource Publication services:
get-Service fdPHost,FDResPub|Set-Service -startuptype automatic -passthru|Start-Service
Fix 7: By Switching On SMB 1.0/CIFS File Sharing Support
1. Open Run and type optionalfeatures in the Run dialog box. Once done, press Enter to open Windows Features.

2. Now, look for SMB 1.0/CIFS File Sharing Support. Check the box present next to it and hit OK.

3. Restart your system to apply the changes.
So, this is how you can fix the Network Discovery not working in Windows 11 issue.
![KapilArya.com is a Windows troubleshooting & how to tutorials blog from Kapil Arya [Microsoft MVP (Windows IT Pro)]. KapilArya.com](https://images.kapilarya.com/Logo1.svg)


Leave a Reply