In Windows 11 operating system, BitLocker Drive Encryption is a data protection feature. This is a inbuilt feature is available in Pro, Enterprise and Education editions. BitLocker is not a new thing, if you are using Windows for a long time. This feature is also available in previous Windows OS such as Windows 10, 8.1, 7. Using BitLocker, you can encrypt your drives so that they’re accessible only to people you want. When you encrypt Windows 11 OS drive with BitLocker, it provides an extra layer of security to the either Windows 11 device. You can manage how and who can access this BitLocker drive. Not to forgot, you can also encrypt any USB drive, and fixed data drives with BitLocker.
On the BitLocker encrypted drives, usually new files are automatically encrypted when you save or create them. These files will be automatically decrypted when you move or copy them to a non-BitLocker encrypted drive. You must be an administrator on your system to enable BitLocker on operating system drive.
Here’s how to part:
Page Contents
Encrypt Windows 11 OS drive with BitLocker
Manual steps
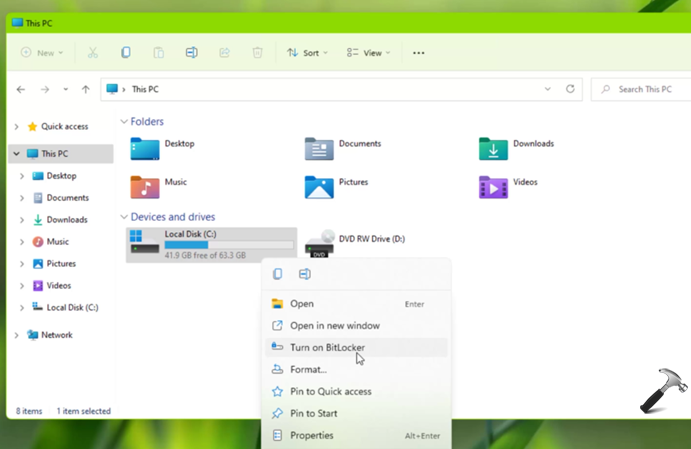
1. Open File Explorer. Go to This PC and locate your operating system drive. To easily identify, the drive usually have a Windows 11 logo over it. Right click on your OS drive and Turn on BitLocker.

2. This will open BitLocker Drive Encryption wizard. Under How do you want to backup your recovery key, you can select either to save it to your Microsoft account or save it to a file or you can also print the recovery key. For saving to Microsoft account, you must be switched to Microsoft account because this option might be missing or may not work, when you are on local account.

3. When your recovery key is saved, you will be notified in that same window. You can click on Next button there to move on.

4. Under Choose how much of your drive to encrypt, you can either select Encrypt used disk space only or you can select Encrypt entire drive. Click Next.

5. Now in choose which encryption mode to use, you can select either to New encryption mode or Compatible mode. Click Next.

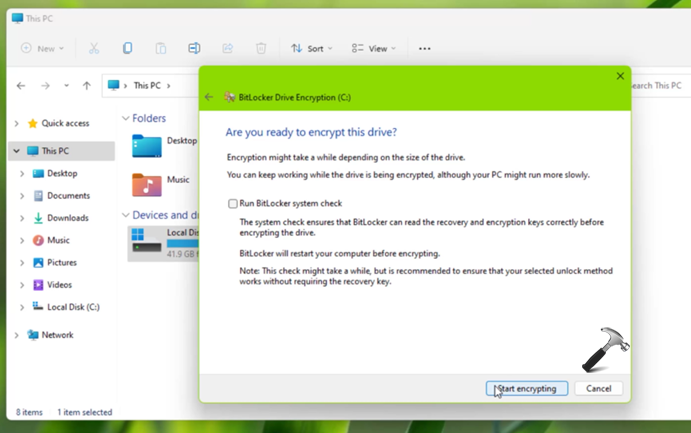
6. Finally, under Are you ready to encrypt this drive, click on Start encrypting button.

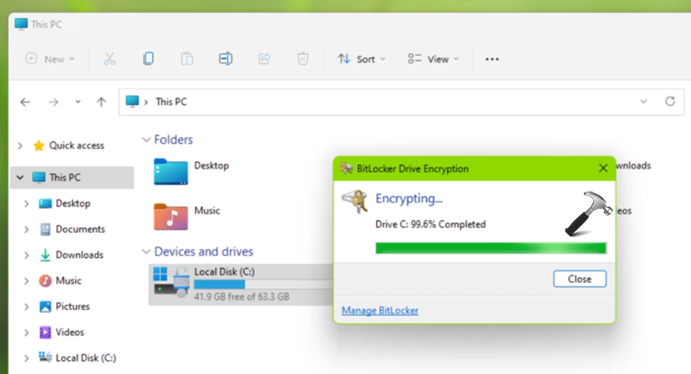
7. This will immediately start encrypting your operating system drive. It completely depends upon the options you have selected previously and it may take time depending upon the data to encrypt.

8. Once the encryption process has been completed you will be able to get that status as show in screenshot, like Encryption of C: is complete.

So this is how you can encrypt operating system drive in your Windows 11.
On Windows 11 Home, you don’t have BitLocker feature. So if you’re on Windows 11 Home, you can instead enable Device Encryption feature.
Video guide
You can checkout live steps in this video:
That’s it!
![KapilArya.com is a Windows troubleshooting & how to tutorials blog from Kapil Arya [Microsoft MVP (Windows IT Pro)]. KapilArya.com](https://images.kapilarya.com/Logo1.svg)


Leave a Reply