One of the most reliable ways to secure your system against unauthorized access is to set a strong password. So, how to change account password in Windows 11? Formerly, there was only one method when it comes to changing the password on Windows. With the latest versions, Windows users have the freedom to add more security to their system through Windows Hello or PIN. Also, there is a need to enter your login credentials every time you sign in unless you make Windows 11 auto login.
So, if you are wondering how to change account password in Windows 11, then worry no more! In this post, we are going to discuss different ways to change your password hassle-free. In Windows 11, you can either have local account or Microsoft account. The ways to change password for both types are mentioned below. Now, let’s get started!
Page Contents
How to Change Account Password in Windows 11
Method 1: Change Local Account Password Using Settings
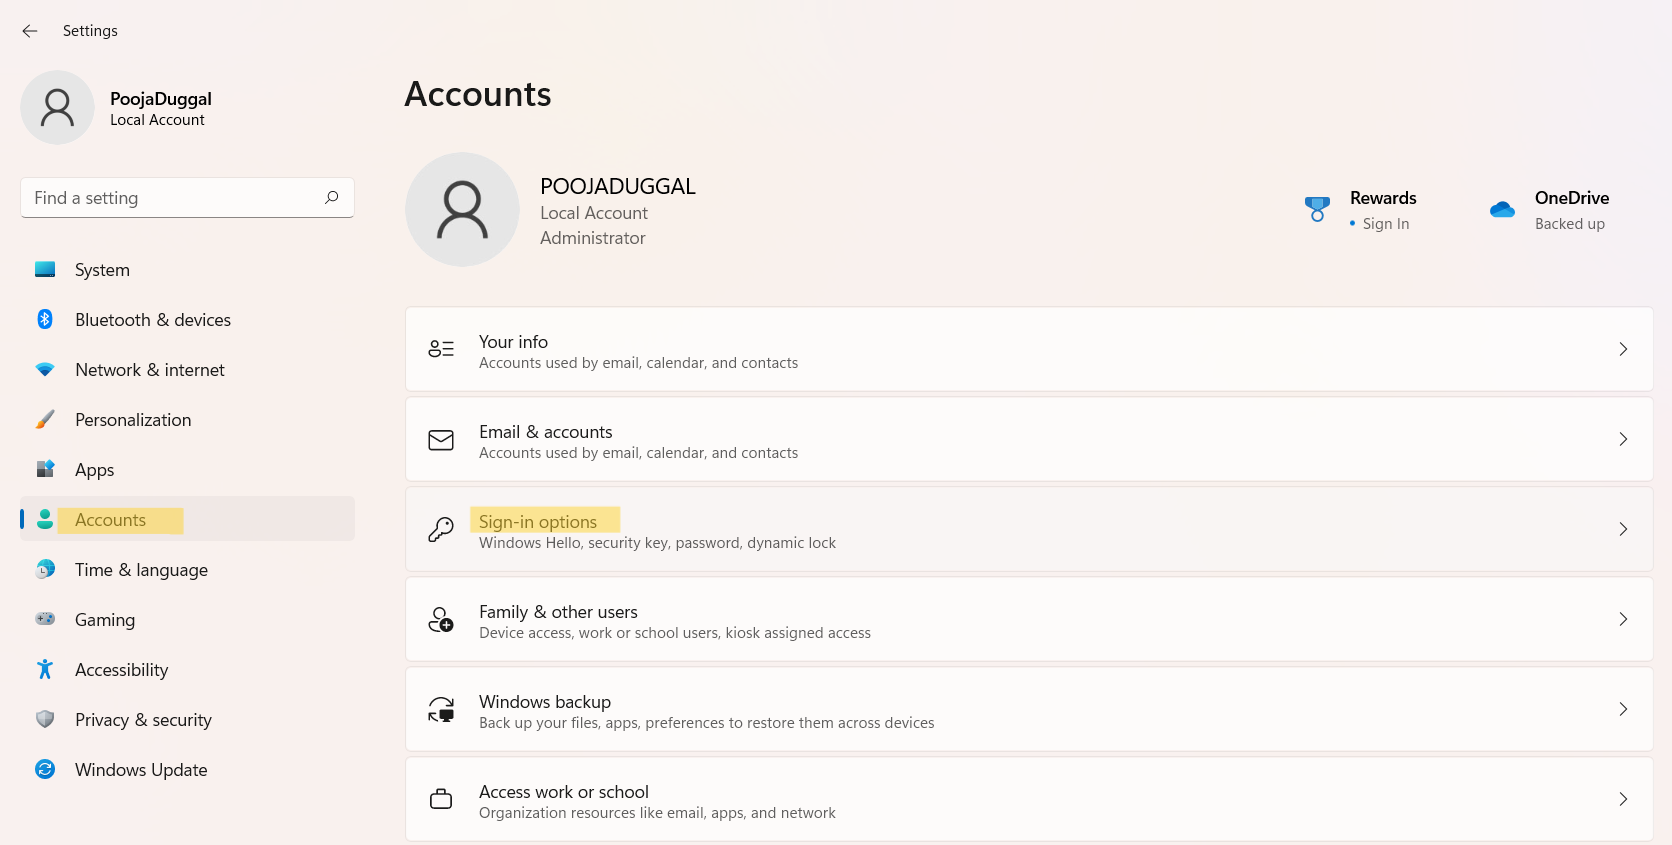
1. Firstly, open Settings through the Windows + I hotkey.
2. Next, click on the Accounts tab present on the left and then, select Sign-in options.

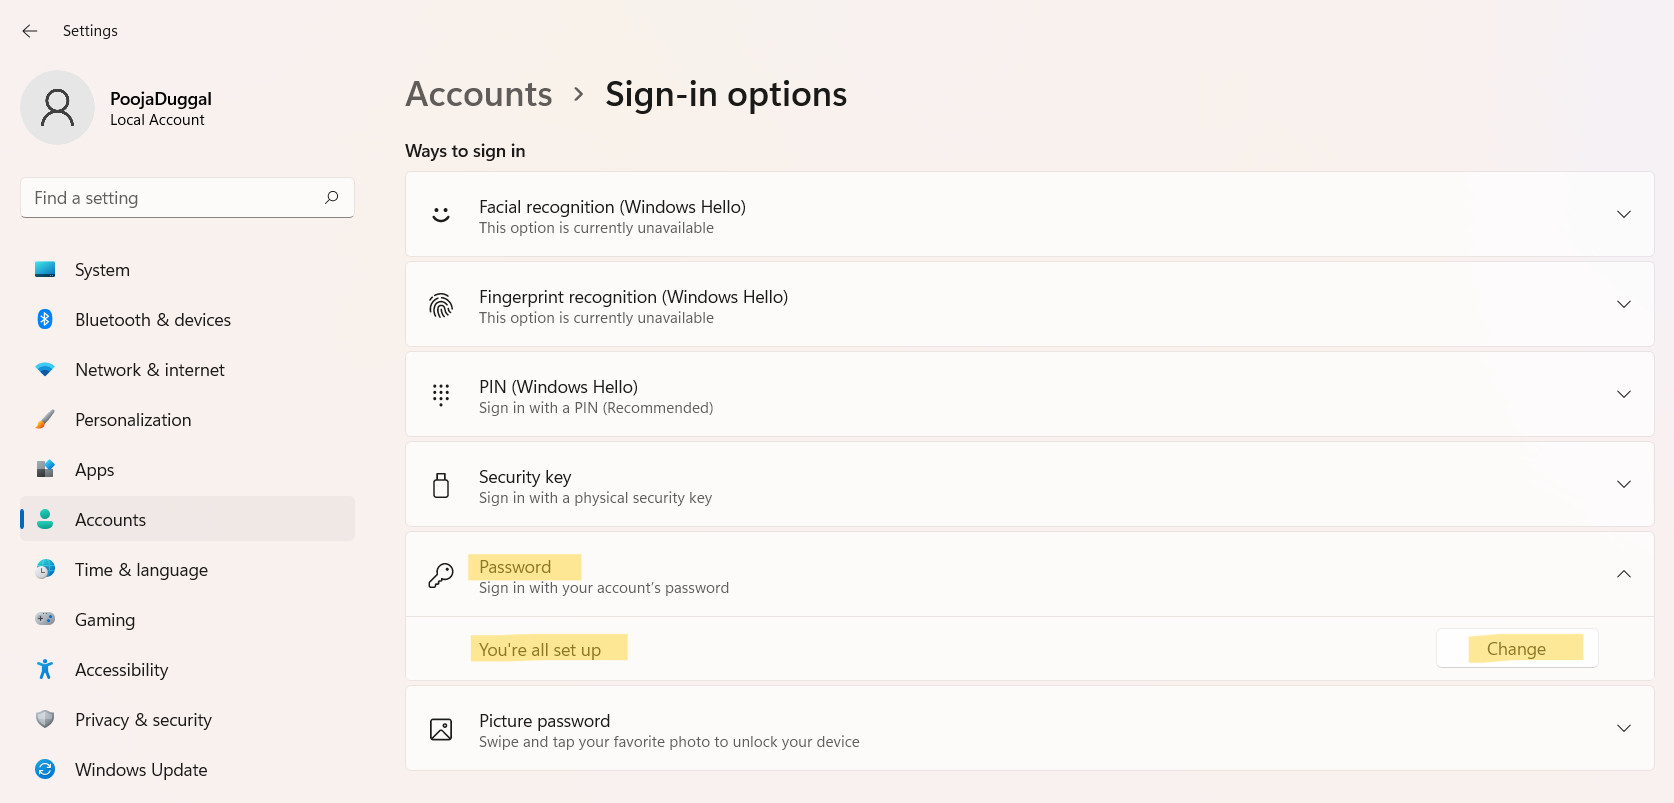
3. From there, select the Password tab. After that, click on the Change tab present next to You’re all set up.

4. In the next window, enter your current password and then, press Next.

5. Now, enter the new password and confirm password. Also, mention the password hint. This helps in recalling the password if you forget.

6. Once done, tap on Next for changing the password.
7. Lastly, click on Finish for closing the window and use your newly created password for signing into your computer the next time. Now, exit Settings.

Method 2: Change Password Through Microsoft Account Login Credentials
1. In the first place, go to the recovery page of Microsoft Account. To do so, visit the https://account.live.com/password/reset link.
2. Now, enter your email address and then, click on Next.

3. For verifying your identity, choose the radio button present next to your email address. Next, you will receive a verification code after clicking on the Get code tab.

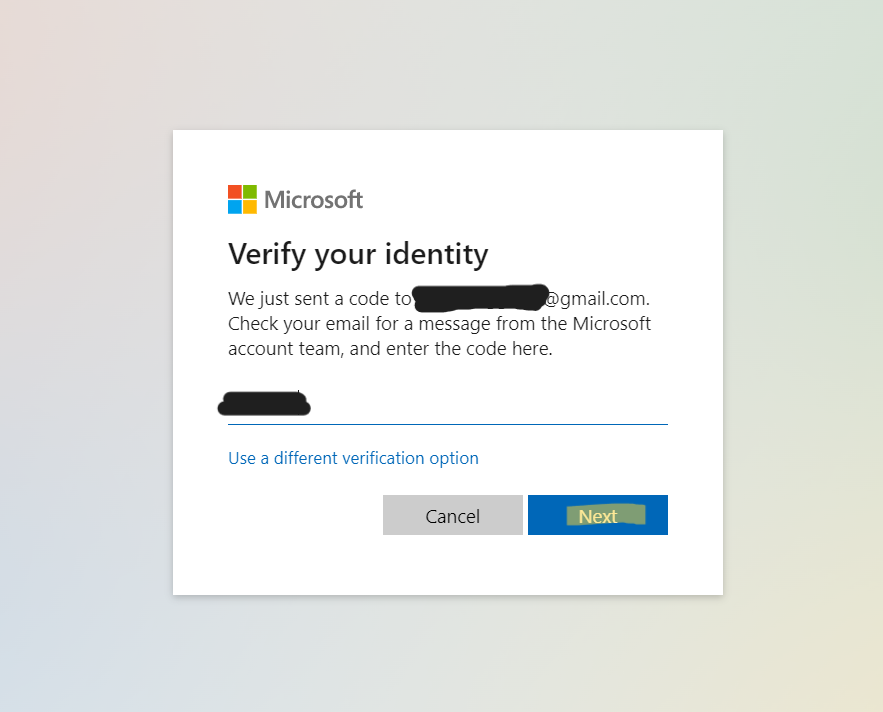
4. In the Verify your identity window, enter the received code and click on Next.

5. Now, you can set a new password for your account. Confirm it and then, press Next to change it.

6. Once done, close the web browser and use your newly created password for logging into your Windows PC.
Method 3: Change Microsoft Account Password Using Settings App
There is another way to change the password of your Microsoft Account. It can also be done through Settings. To do so, follow:
1. Open Settings and go to Accounts. After that, select the Sign-in options tab.

2. Under the Password tab, choose the Change option present next to You’re all set up.

3. Now, enter your current password and then, the new password. Once set, click on Next. Now, try signing in with your newly created password.

So, these are some simple methods to change Account Password in Windows 11.
![KapilArya.com is a Windows troubleshooting & how to tutorials blog from Kapil Arya [Microsoft MVP (Windows IT Pro)]. KapilArya.com](https://images.kapilarya.com/Logo1.svg)


Leave a Reply