In our earlier guide, we have shared how to use new Windows Terminal app in Windows 10. Windows terminal app is basically a cross-platform app which allows you to run command line tools under different profiles. This app has a lot of customization abilities. You can customize default profiles, as well as the new profiles you create. Check this guide to create new profiles in Terminal app. Since the app has a lot of customization abilities, at a time you might need to restore it default settings. In this guide, we’ll see how to reset Windows Terminal to default settings in Windows 10.
As I mentioned above, Terminal app has many options to customize. You can customize fonts, appearance, titles etc. to give it your own look. In case if you ever need to restore this app’s default settings, here is how you can.
Page Contents
Reset Windows Terminal to default settings in Windows 10
Method 1 – Using Settings app
- Right click Start Button or press
 + X keys and select Settings.
 - In the Settings app, go to Apps > Apps & features.
- In right pane of Apps & features, locate Windows Terminal. Click Advanced options link there.
- Under Windows Terminal advanced settings, click on Reset.
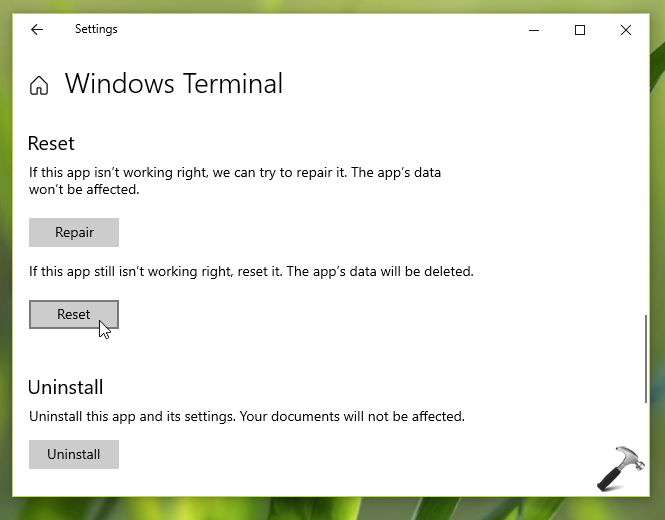
This was the easiest way to reset Windows Terminal to default settings.
Method 2 – Via Terminal app JSON file
1. Open Windows Terminal app.
2. In the app, click on ⌄ over tab bar and select Settings.
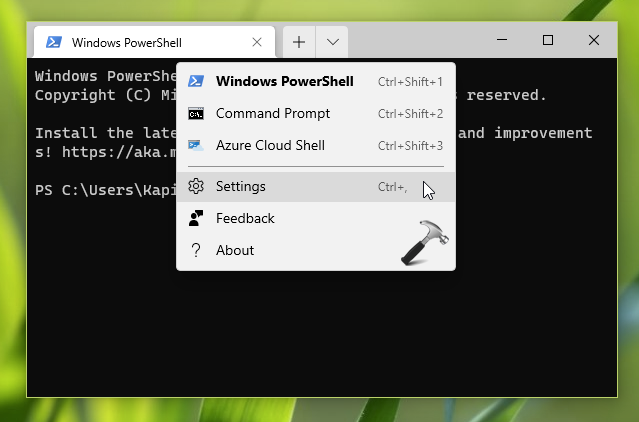
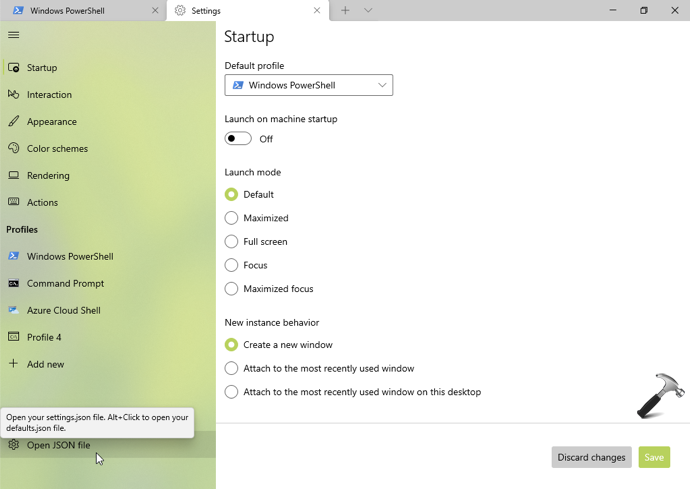
3. On Settings tab, click on Open JSON file in the left pane.
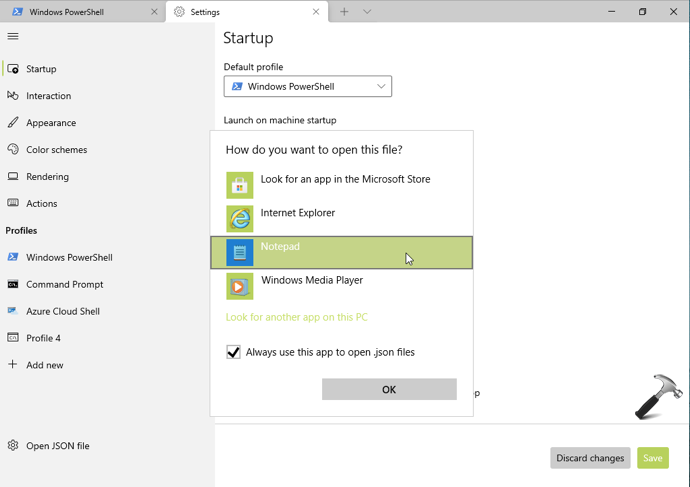
4. Since Windows doesn’t have any default app to open JSON file, you can select Notepad to open this file.
5. In the Notepad window, you can copy all content to a new Notepad file for backup. Then delete all the contents inside settings.json file we open in previous step and finally, save it.
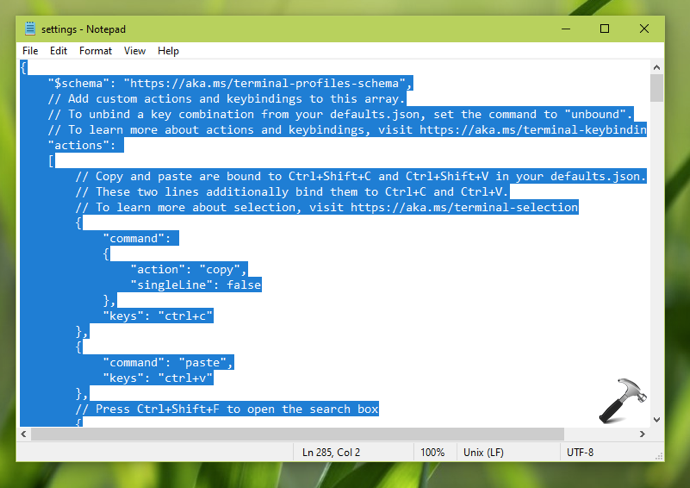
In this way, Windows Terminal app should be reset to default.
That’s it!
![KapilArya.com is a Windows troubleshooting & how to tutorials blog from Kapil Arya [Microsoft MVP (Windows IT Pro)]. KapilArya.com](https://images.kapilarya.com/Logo1.svg)


 + X keys and select Settings.


Leave a Reply