Your printer can have online and offline status. When it is online, you can print using it but when it is offline, it won’t be able to communicate with your Windows 10 device. Now there could be different reasons why your printer is offline. Common causes includes:
- Printer may be in error state and it directed Windows put the printer into offline state.
- Someone else present on your Windows 10 machine explicitly set it to offline status.
- It is not connected to the machine by cable or via network. For network printers, they may go to offline status when network IP is changed.
Whatever may the cause, if you want to bring back your printer to online status, you can try either of methods mentioned below. However, I recommend you to restart printer before trying below methods, as it could sometimes solve the issue.
Page Contents
Change Printer From Offline To Online Status In Windows 10
Method 1 – Using Settings App
1. Right click Start Button or press  + X keys and select Settings.
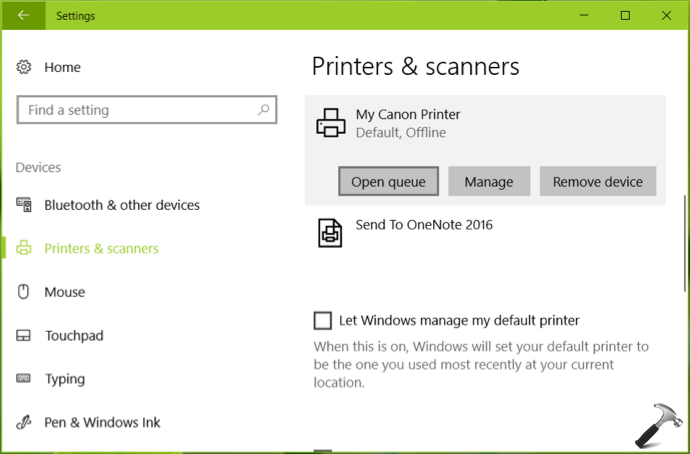
2. In the Settings app, navigate to Devices > Printers & scanners.
3. Now in right pane of Printers & scanners, click on your offline printer and then hit Open queue button.
4. This will open Use Printer Offline window. Click on Printer and then uncheck Use Printer Offline option.
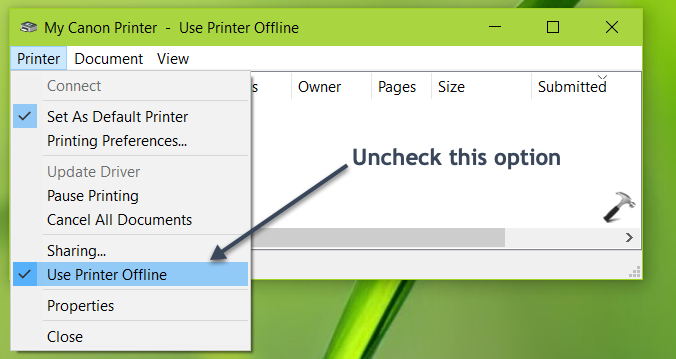
Above steps should immediately set the printer to online status. If you can’t open access or open Settings app or if this method doesn’t works, try Method 2 mentioned next.
Method 2 – Using Control Panel
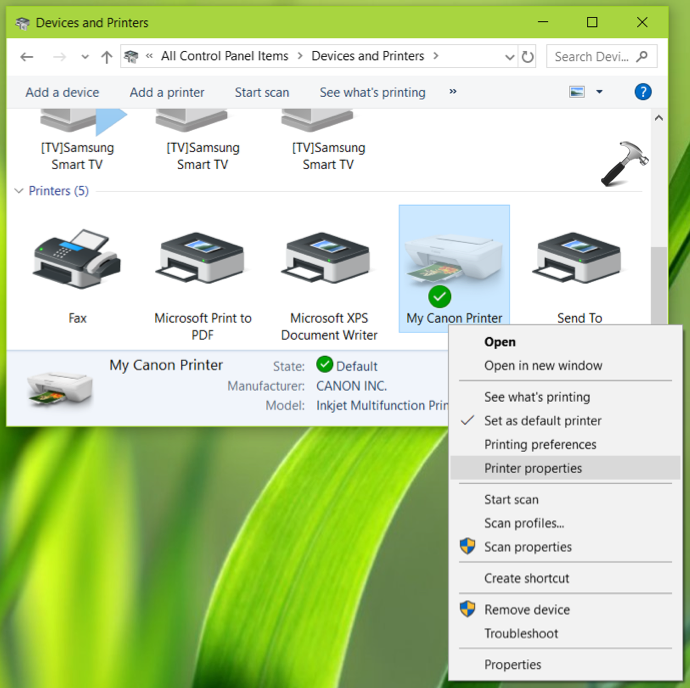
1. Open Control Panel and search for Devices and Printers and open it. Under Devices and Printers window, right click on your offline printer and select Printer properties.
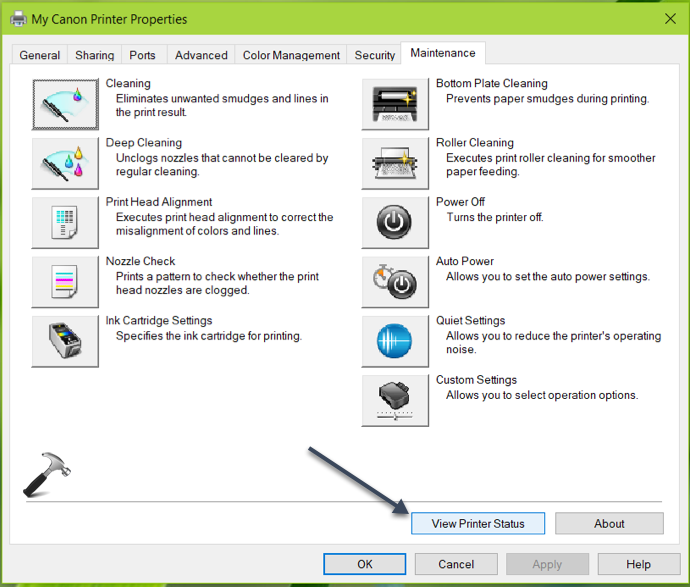
2. Under printer property screen, click View Printer Status button.
3. Next, under printer status window, click Display Print Queue button.
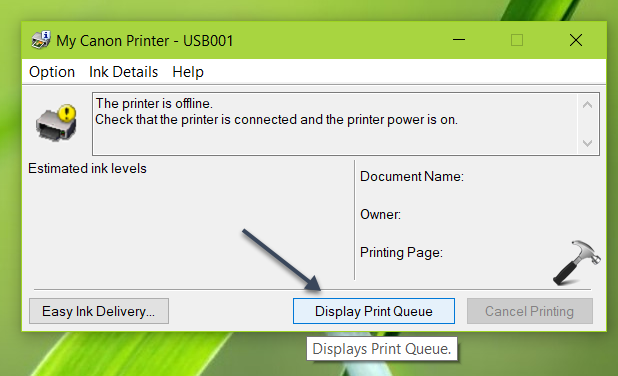
4. This will take you to another window, where you click on Printer and then uncheck Use Printer Offline option.
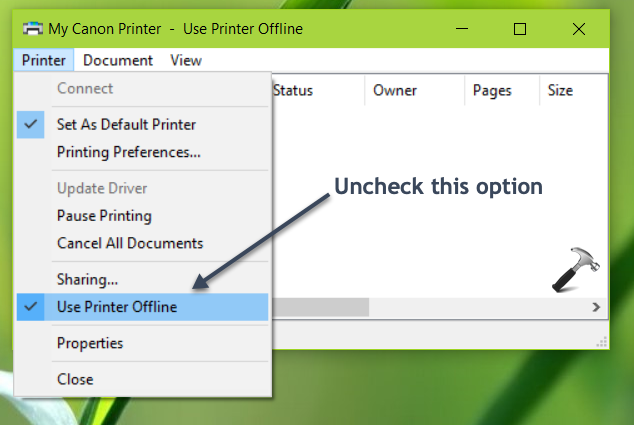
Your printer should now have offline status. You can check the same in printer status window shown in step 3.
That’s it!
![KapilArya.com is a Windows troubleshooting & how to tutorials blog from Kapil Arya [Microsoft MVP (Windows IT Pro)]. KapilArya.com](https://images.kapilarya.com/Logo1.svg)




Leave a Reply