In Windows, operating system files are hidden by default. These files are well protected and doesn’t shows, even when you’ve Hidden items checked in View tab of File/Windows Explorer.
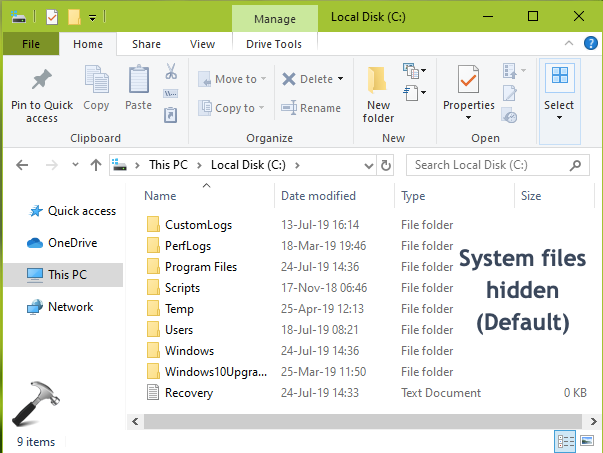
These protected operating system files are hidden because they’re important for running your system and if modified, this will directly impact system performance. In case if you’re facing issues on your system, for troubleshooting purpose, you can make these files shown. Once you’re done with troubleshooting and fixing the issue you’re facing, you should restore the default setting to hide these protected operating system files, so that someone else couldn’t mess with them.
Page Contents
How To Show/Hide Protected Operating System Files In Windows
FYI: Remember to keep protected operating system files hidden under normal usage. Let them show, only when it is required.
Method 1 – Via Folder Options
1. Press  + E to open File Explorer.
2. Under File Explorer ribbon, click View > Options > Change folder and search options.
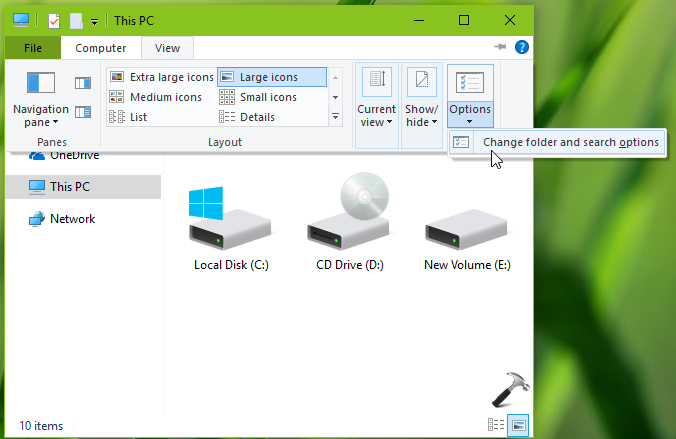
3. In Folder Options window, switch to View tab. Under Advanced settings, uncheck Hide protected operating system files (Recommended) option to show system files.

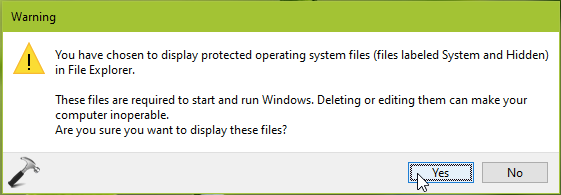
4. In the confirmation prompt appeared next, click Yes button. Then click Apply, OK in Folder option window shown above.
Return back to File/Windows Explorer and you should be able to see protected operating system files.

To revert back to default setting later, i.e. simply check the Hide protected operating system files (Recommended) option.
Method 2 – Via Registry
Registry Disclaimer: The further steps will involve registry manipulation. Making mistakes while manipulating registry could affect your system adversely. So be careful while editing registry entries and create a System Restore point first.
1. Press  + R and put
 regedit in Run dialog box to open Registry Editor (if you’re not familiar with Registry Editor, then click here). Click OK.

2. In left pane of Registry Editor window, navigate to following registry key:
HKEY_CURRENT_USER\SOFTWARE\Microsoft\Windows\CurrentVersion\Explorer\Advanced
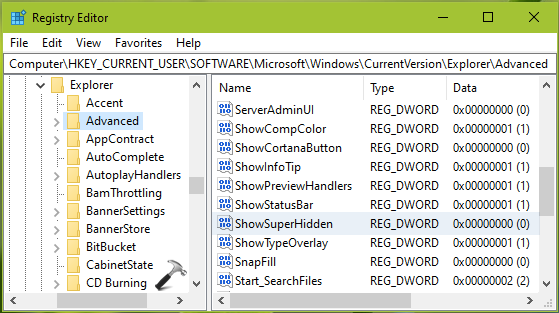
3. In the right pane of Advanced registry key, look for registry DWORD (REG_DWORD) named ShowSuperHidden. Double click to modify its Value data:

4. Set the Value data to 1 so that Windows can show protected operating system files. Or set it to 0 to hide protected operating system files (default setting). Click OK, close Registry Editor and reboot to make changes effective.
That’s it!
![KapilArya.com is a Windows troubleshooting & how to tutorials blog from Kapil Arya [Microsoft MVP (Windows IT Pro)]. KapilArya.com](https://images.kapilarya.com/Logo1.svg)






Leave a Reply