With Windows 10 V1803 or later, Microsoft has introduced Focus assist feature. The feature was earlier called Quiet hours, but Microsoft renamed it to Focus assist and added more options to it. In this article, we’ll see how to configure this redesigned feature.
Focus assist feature as the name suggests, will allow you to focus on your current work by blocking unwanted notifications or distractions. The feature is quite useful while you’re working on PowerPoint presentation or playing full screen game. In such cases, the feature would be automatically turned off avoiding further distractions from notifications.
You can enable or disable Focus assist quickly from Action Center.
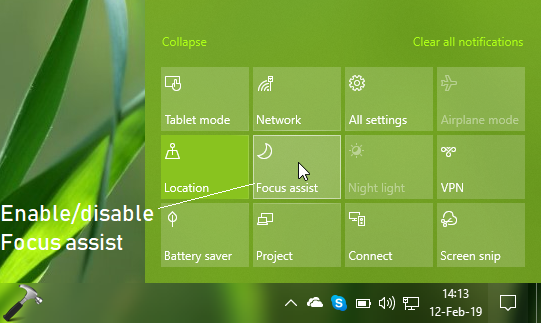
To configure the feature as per your need, follow below mentioned steps.
How To Configure Focus Assist In Windows 10
1. Right click Start Button or press  + X keys and select Settings.
2. In the Settings app, navigate to System > Focus assist.
3. Under Focus assist, you can select an option between below ones, as per your requirement.
- Off: This will allow all notifications without any filter.
- Priority only: You’ll be able to get notifications fulfilling the priority list. Other notifications will be directed to Action Center.
- Alarms only: All notifications will be hidden and only alarm notifications are allowed.
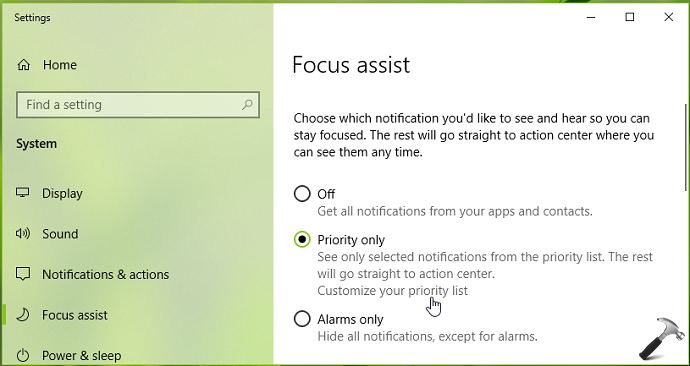
4. In case if you select Priority only option above, click on Customize your priority list link.
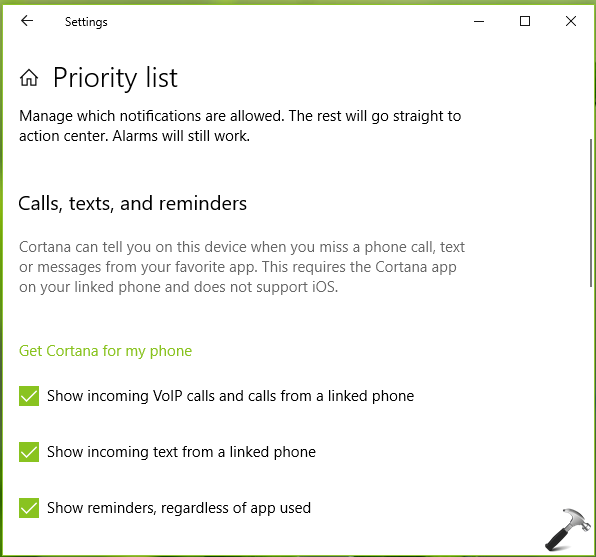
5. Then in Priority list, you can manage the notifications you want to allow under Focus assist feature. Below screenshot shows the options available for calls/texts/reminders.
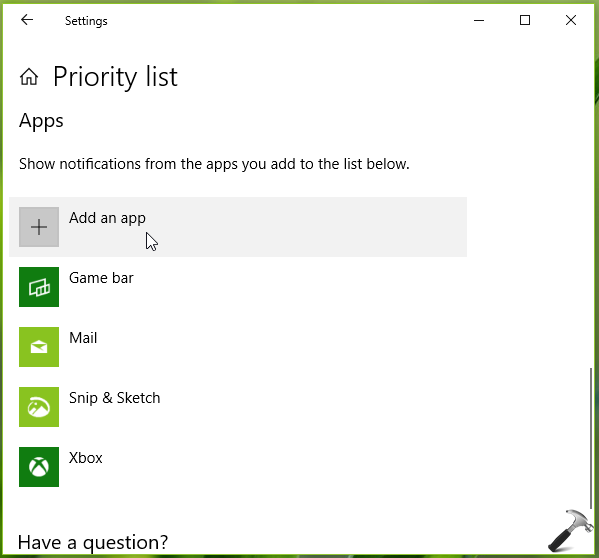
6. In the same window, you can can choose the apps from which you want to allow notifications when Focus assist is enabled. You can add the apps of top priority for you, in this list.
Close Settings app, when you’re done.
In this way, you’ve configured Focus assist on your Windows 10. You can now manage the feature from Action Center.
That’s it!
![KapilArya.com is a Windows troubleshooting & how to tutorials blog from Kapil Arya [Microsoft MVP (Windows IT Pro)]. KapilArya.com](https://images.kapilarya.com/Logo1.svg)




Leave a Reply