If your laptop comes with backlit keyboard feature but if its not working, this article is for you. Backlit keyboard feature is useful at night, as it glows up the keyboard and you do not face any difficulty while typing. It is available on selective machines from Dell.
Recently, we came around this issue as the backlit keyboard on our Dell machine stopped working. We were able to fix it up by reinstalling the keyboard driver. So we thought to write this article, in case if others also have this problem.
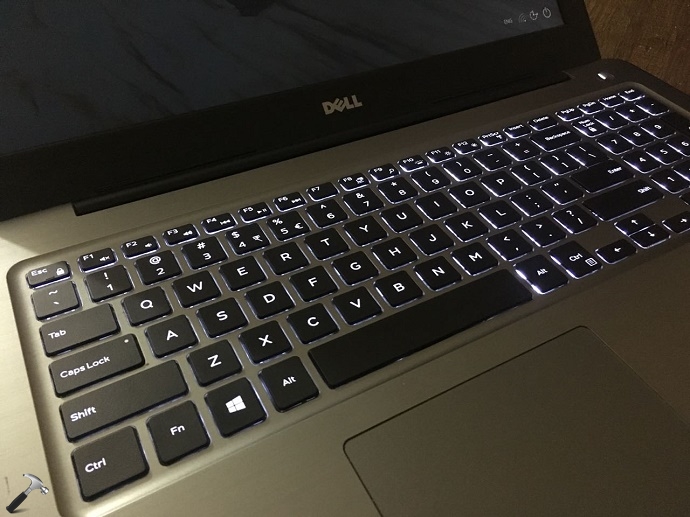
Well, when backlit keyboard stops working, you must use function keys to check its settings. You can press F10 or Fn + F10 keys to enable/disable backlit keyboard. If that doesn’t works, try pressing Esc + Fn + F10 keys and see if the backlit keyboard is in action now.
If keyboard combination doesn’t works, you can try below fixes and see if they helps.
Page Contents
FIX: Backlit Keyboard Is Not Working In Windows 10 On Dell Laptops
FIX 1 – Check BIOS Setting
1. Press F12 key repeatedly when your system is started and you see the Dell logo. This will let machine open one-time boot menu.
2. Next, select BIOS Setup option to boot from.
3. On the BIOS Setup wizard, go to Settings > System Configuration > Keyboard Illumination. Since you’re facing this issue, the option might be set to Disabled. Change the option to Dim or Bright and click Apply.
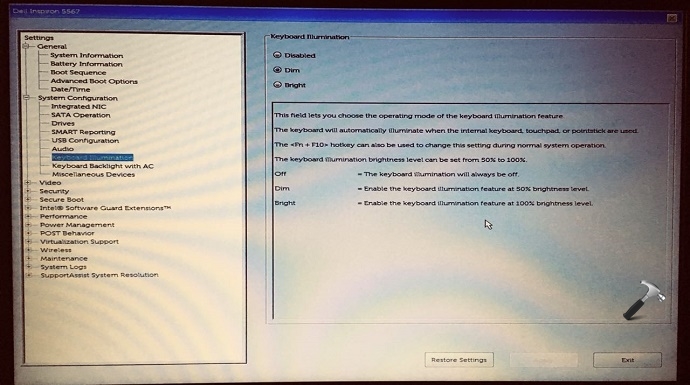
4. Click Exit and your machine will restarted, continue booting to your Windows 10.
If you still have the issue, go ahead with FIX 2.
FIX 2 – Reinstall Keyboard Driver
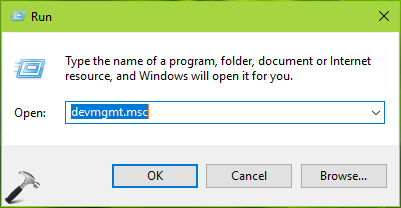
1. Press  + R and type devmgmt.msc in the Run, hit Enter key to open Device Manager snap-in.
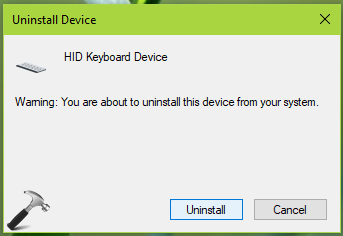
2. In the Device Manager window, expand Keyboards and right click on HID Keyboard Device and select Uninstall device.
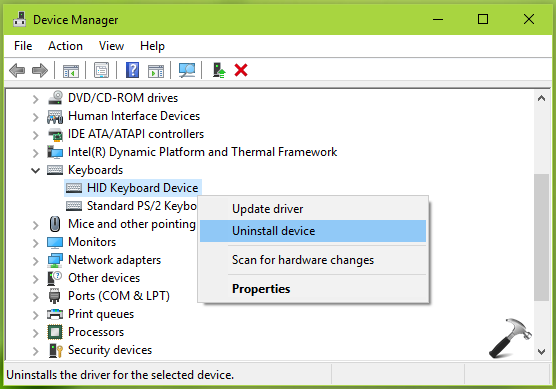
3. In the Uninstall Device confirmation box, click Uninstall.
4. Then you may be prompted to restart the machine, so select Yes on confirmation prompt.
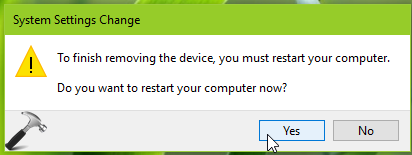
After rebooting the machine, the keyboard should be reinstalled in factory conditions. This should fix up the issue.
Hope this helps!
![KapilArya.com is a Windows troubleshooting & how to tutorials blog from Kapil Arya [Microsoft MVP (Windows IT Pro)]. KapilArya.com](https://images.kapilarya.com/Logo1.svg)





Leave a Reply