If you’re a developer or IT administrator, sometime you may have special requirement to disable access to Start Menu/Start Screen by users in your workplace. This post will show you how to achieve this aim using a reversible method and without deploying any complex procedure.
By default, if you hit Start Button, you see Start Menu. Using steps mentioned here, you can change this functionality to Start Screen.
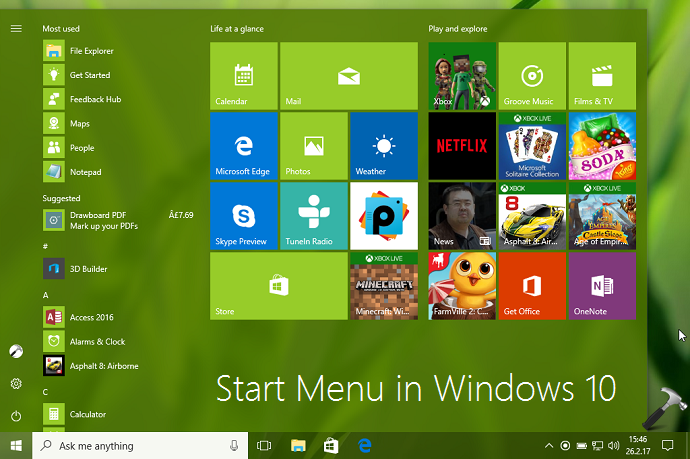
See, Start Menu/Screen is integrated with Windows Shell Experience Host and as soon as you login to your Windows 10, this host initiates its process to load Start Menu/Screen. You can disable these entities either for a single user or a group of users loaded on your machine, using methods mentioned below.
Here is how you can kill Start Menu/Screen in Windows 10:
Page Contents
How To Disable Access To Start Menu/Screen In Windows 10
We recommend you to create a System Restore point before trying either of the ways.
WAY 1 – Using Registry
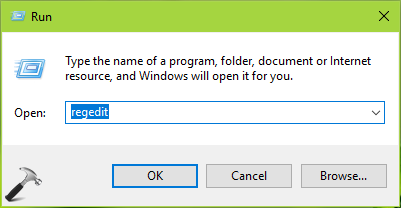
1. Press  + R and put regedit in Run dialog box to open Registry Editor (if you’re not familiar with Registry Editor, then click here). Click OK.
2. In left pane of Registry Editor window, navigate to following registry key:
HKEY_CURRENT_USER\Software\Microsoft\Windows\CurrentVersion\Explorer\Advanced
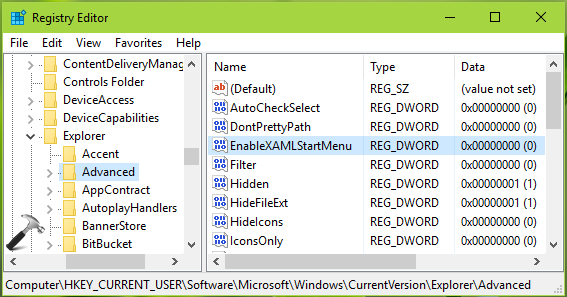
3. In the right pane of Advanced folder, right click and select New > DWORD Value. Name the newly created registry DWORD (REG_DWORD) as EnableXAMLStartMenu. Double click on it to modify its Data.
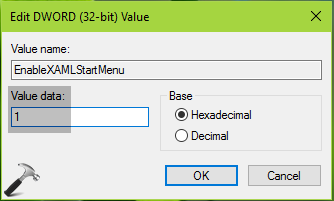
4. Finally, set the Value data to 1 and click OK. Close Registry Editor and restart your machine to block Start Menu/Screen. To re-enable Start Menu/Screen later, simply delete EnableXAMLStartMenu DWORD.
WAY 2 – By Denying User Permissions To Start Menu/Screen
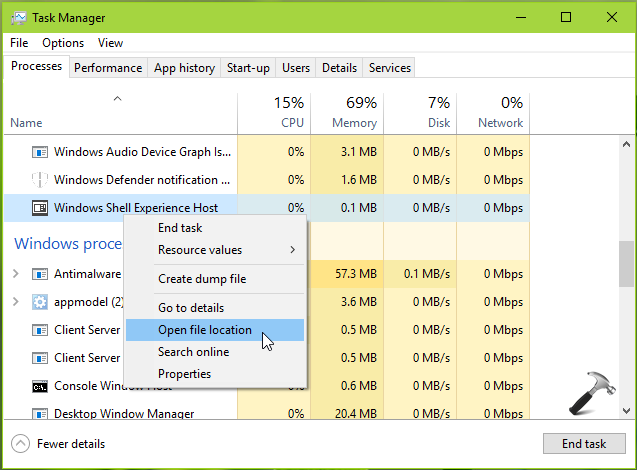
1. Press Ctrl+Shift+Esc keys to open Task Manager. In Task Manager window, on Process tab, locate Windows Shell Experience Host process and right click on it, select Open file location.
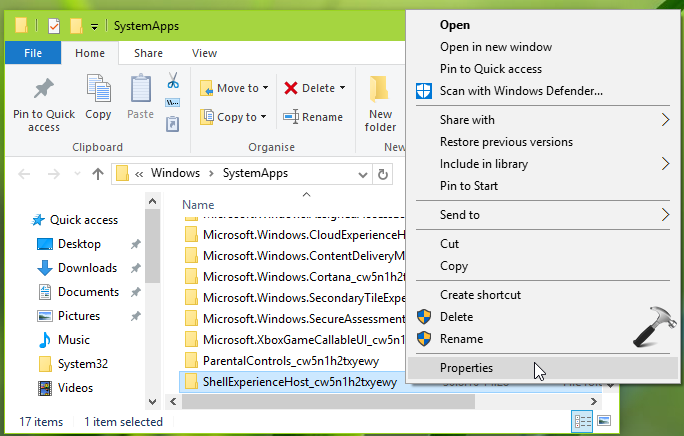
2. In the folder so opened (SystemApps), right click on already highlighted folder i.e. ShellExperienceHost_cw5n1h2txyewy and select Properties.
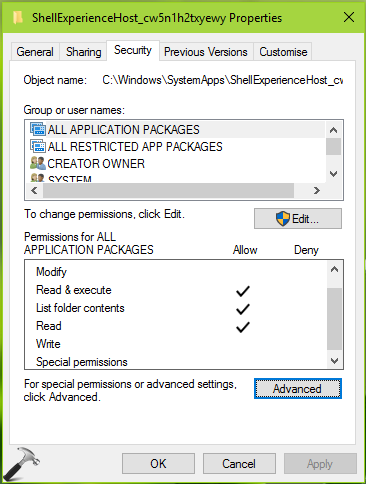
3. On the property sheet window, switch to Security tab. Now click on Advanced button.
4. Then you’ll realize that the owner for folder is TrustedInstaller. So you need to take ownership of the folder using steps mentioned here.
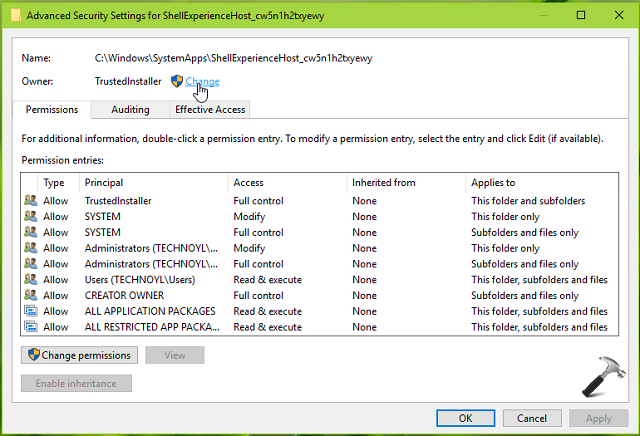
5. Once you taken the ownership, click Edit button on below shown window.
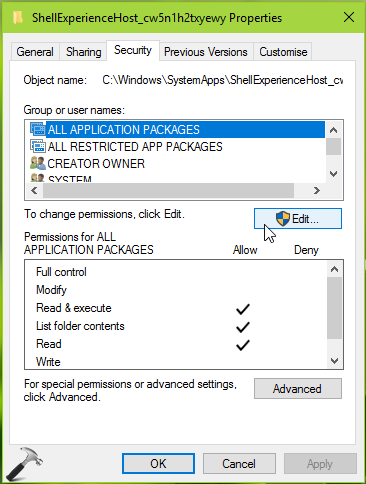
6. Now in Permissions sheet, select the user or group who you want to prevent access to Start Menu/Screen. Then check mark Deny against Full control. Click Apply followed by OK. Exit the File Explorer in this way and reboot your device.
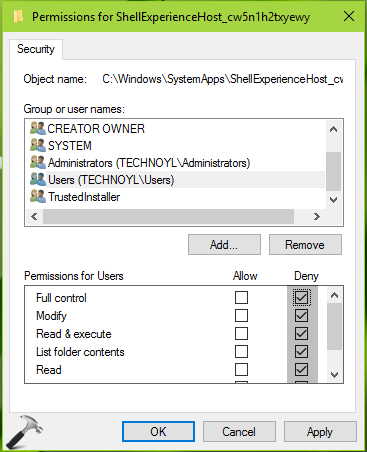
After restart, you’ll find that your desired selected users can no longer access Start Menu/Screen now. To re-enable Start Menu/Screen, simply restore the tick marks for Allow on the Permissions sheet.
That’s it!
![KapilArya.com is a Windows troubleshooting & how to tutorials blog from Kapil Arya [Microsoft MVP (Windows IT Pro)]. KapilArya.com](https://images.kapilarya.com/Logo1.svg)






6 Comments
Add your comment
Hey,
This is an excellent tutorial! Thanks so much for sharing! I love that you included many detailed screenshots. I have been trying to figure out how to disable the start menu for a while. This was a great help! I think this will really help to improve productivity when I’m working on the computer.
Best,
Dennis
^^ Glad you found the guide helpful 😊
What do you mean with “Disable Access To Start Menu/Screen In Windows 10”?? Because my Start Menu stays the same after…
^^ Start Screen is different thing: https://www.kapilarya.com/how-to-enable-start-screen-in-windows-10
* procedure of registry doesn’t work, start menu remains same.
and how to disable right click
^^ Have you tried WAY 2, via permissions?