Aero glass transparency is the visual effect that is available in taskbar, Start Menu etc. Microsoft introduced it in Windows Vista but take it away in Windows 8. You can try some tweaks to make it available for Windows 8 and 8.1:
WinAeroGlass : Get Windows 7 Like Aero Glass In Windows 8
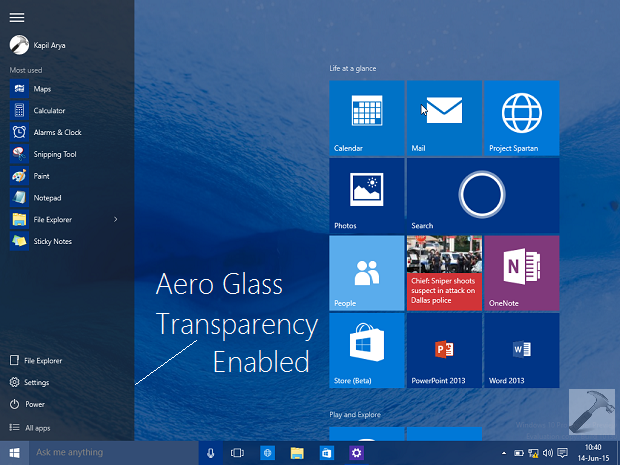
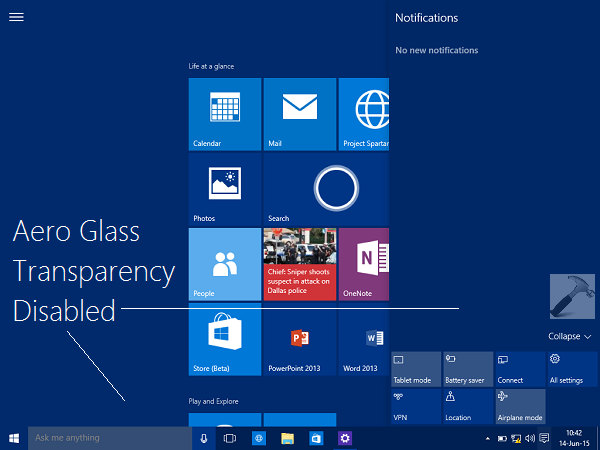
Still, many customers are fan of Aero effect and to please them, Microsoft has offered some the Aero glass transparency effects in Windows 10. The visual effect for Windows 10 is pronounced in Start (Menu and Screen), taskbar, notifications or action center.
Here is how it looks:
Recommended : How to enable Start Screen in Windows 10
The reason behind Microsoft taken away Aero effects in Windows 8 is to improve system performance. It’s not only Aero but there are many factors such as animations, flash etc. which reduces system performance. Thus in case, if you want to avoid your system performance from being sluggish in Windows 10, you can disable the Aero glass transparency.
Page Contents
Manually Disable Aero Glass Transparency From Start, Taskbar & Action Center In Windows 10
There are two ways you can do this:
WAY 1 – Disable Manually From Settings App
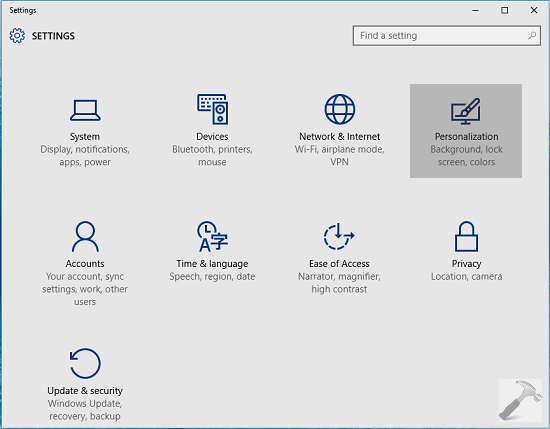
1. Open Settings app and pick Personalization option as highlighted here:
2. In the Personalization screen, select Colors from left pane. In the corresponding right pane, look for the Make Start, taskbar and action center transparent option. The option is enabled by default, so kindly disable it.
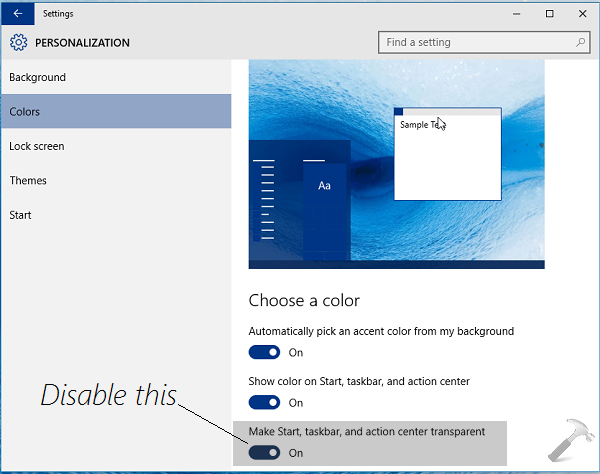
Thus, in this way the Aero glass transparency effects are instantaneously removed from your Windows 10. If you want to force Windows 10 to remove these effects, try the registry steps mentioned below:
WAY 2 – Disable Forcefully Using Registry Manipulation
Registry Disclaimer: The further steps will involve registry manipulation. Making mistakes while manipulating registry could affect your system adversely. So be careful while editing registry entries and create a System Restore point first.
1. Press  + R and put regedit in Run dialog box to open Registry Editor (if you’re not familiar with Registry Editor, then click here). Click OK.
2. Moving on, in the left pane of Registry Editor, navigate to following location:
HKEY_CURRENT_USER\Software\Microsoft\Windows\CurrentVersion\Themes\Personalize
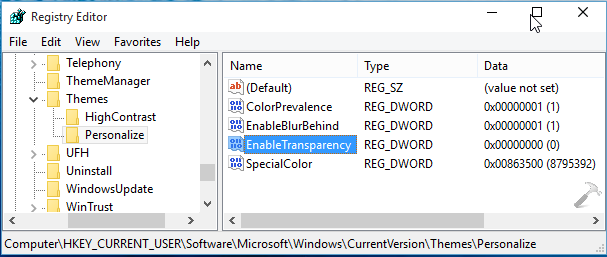
3. In the right pane of above shown window, look for the registry DWORD (REG_DWORD) named EnableTransparency which must be having its Data set to 1 by default. You have to double click on it and make it 0 by inputting 0 as Value data. Click OK when you’re done and close the Registry Editor.
Restart Windows Explorer from Task Manager to make your made changes effective:
That’s it! Go here to checkout how to completely disable OneDrive integration in Windows 10.
![KapilArya.com is a Windows troubleshooting & how to tutorials blog from Kapil Arya [Microsoft MVP (Windows IT Pro)]. KapilArya.com](https://images.kapilarya.com/Logo1.svg)




Leave a Reply